
So for my first project post, I decided to focus on something I’ve already made instead of a work in progress. So the first post is to show off my Gryffindor costume, obviously from the Harry Potter fandom.
Over christmas I finally got my hands on the patch for the robes so I was able to complete them.
To make these robes I searched for ages through Live Journal and google to find a pattern to use; unfortunately I couldn’t find one I liked enough to alter but I did happen upon this site which gives a very clear step by step guide on how to alter a bought pattern to make the robes.
Instead of using a bought pattern I drew up a basic body block to fit my size using my Winifred Aldrich book and altered it using the steps on the website.

I used basic black poly-cotton for the outer and red for the lining. It is fully lined, including the hood.

As described on the website the hood is pointed and sits at the waist.
As a finish I added an internal wand pocket, which sits at my waists and is close enough to pull the wand out without too much trouble.

The robe was sewn both on an electric machine and using a hand crank machine. The pocket was hand stitched.
To make the closures, I fitted a small hook-and-eye closure to the inside of the robe, used a DIY covered button, covered with left over black fabric and black cord to make a frog.
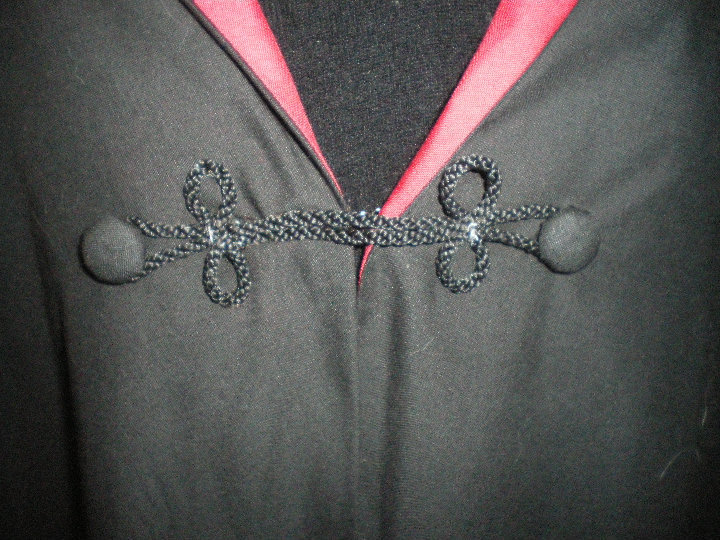
The frog is stitched onto the robes on one side and attached at the opening of the robes. looping over the other button to give the llusion that it holds the robes together.
An example of the finished robes with the patch stiched on, sitting just below the frog.
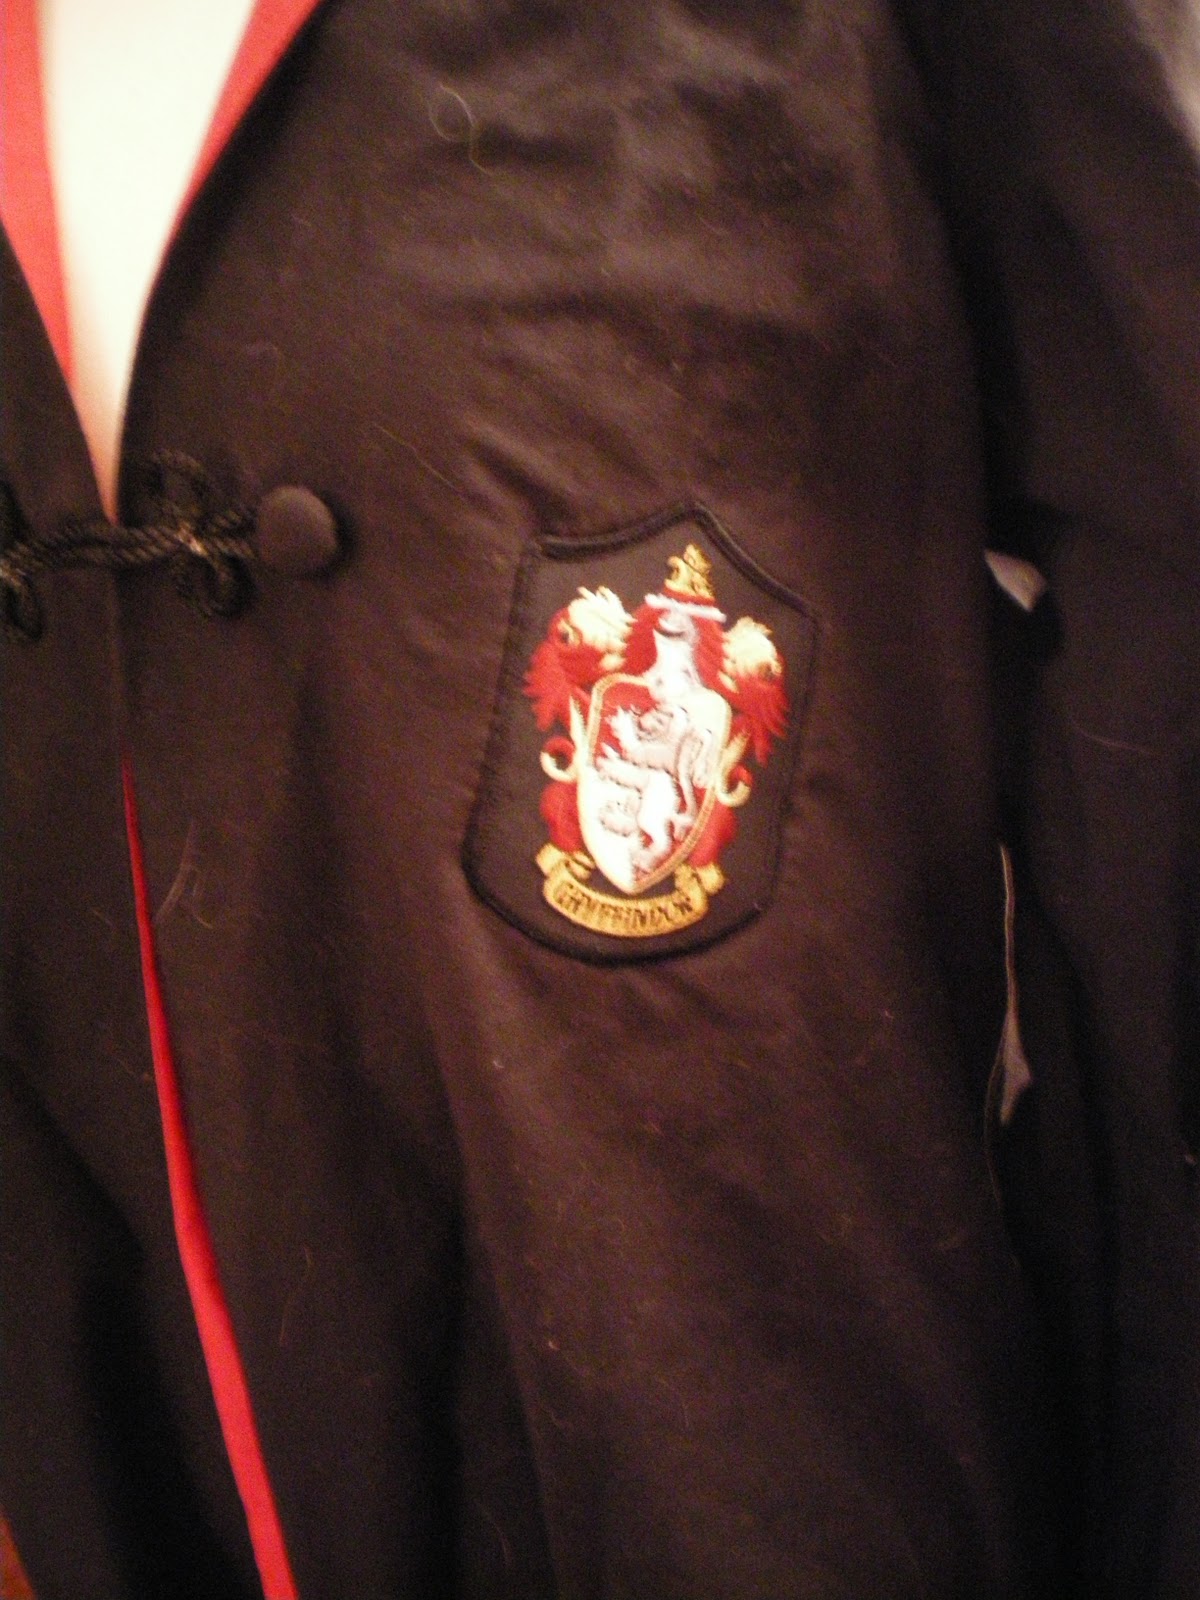
It looks like its sitting awkwardly but it is just the way it lies on the mannaquin. 🙂
And a photo of the finished costume (although minus the patch)

To finish the costume I made a couple of ties. My first attempt with making a tie was in the style of the first two movies. Using an old tie from my dad’s collection I took a pattern and cut it out in dark red/scarlet satin. I then stitched gold ribbon across it by machine. I then hand stitched it all back together.
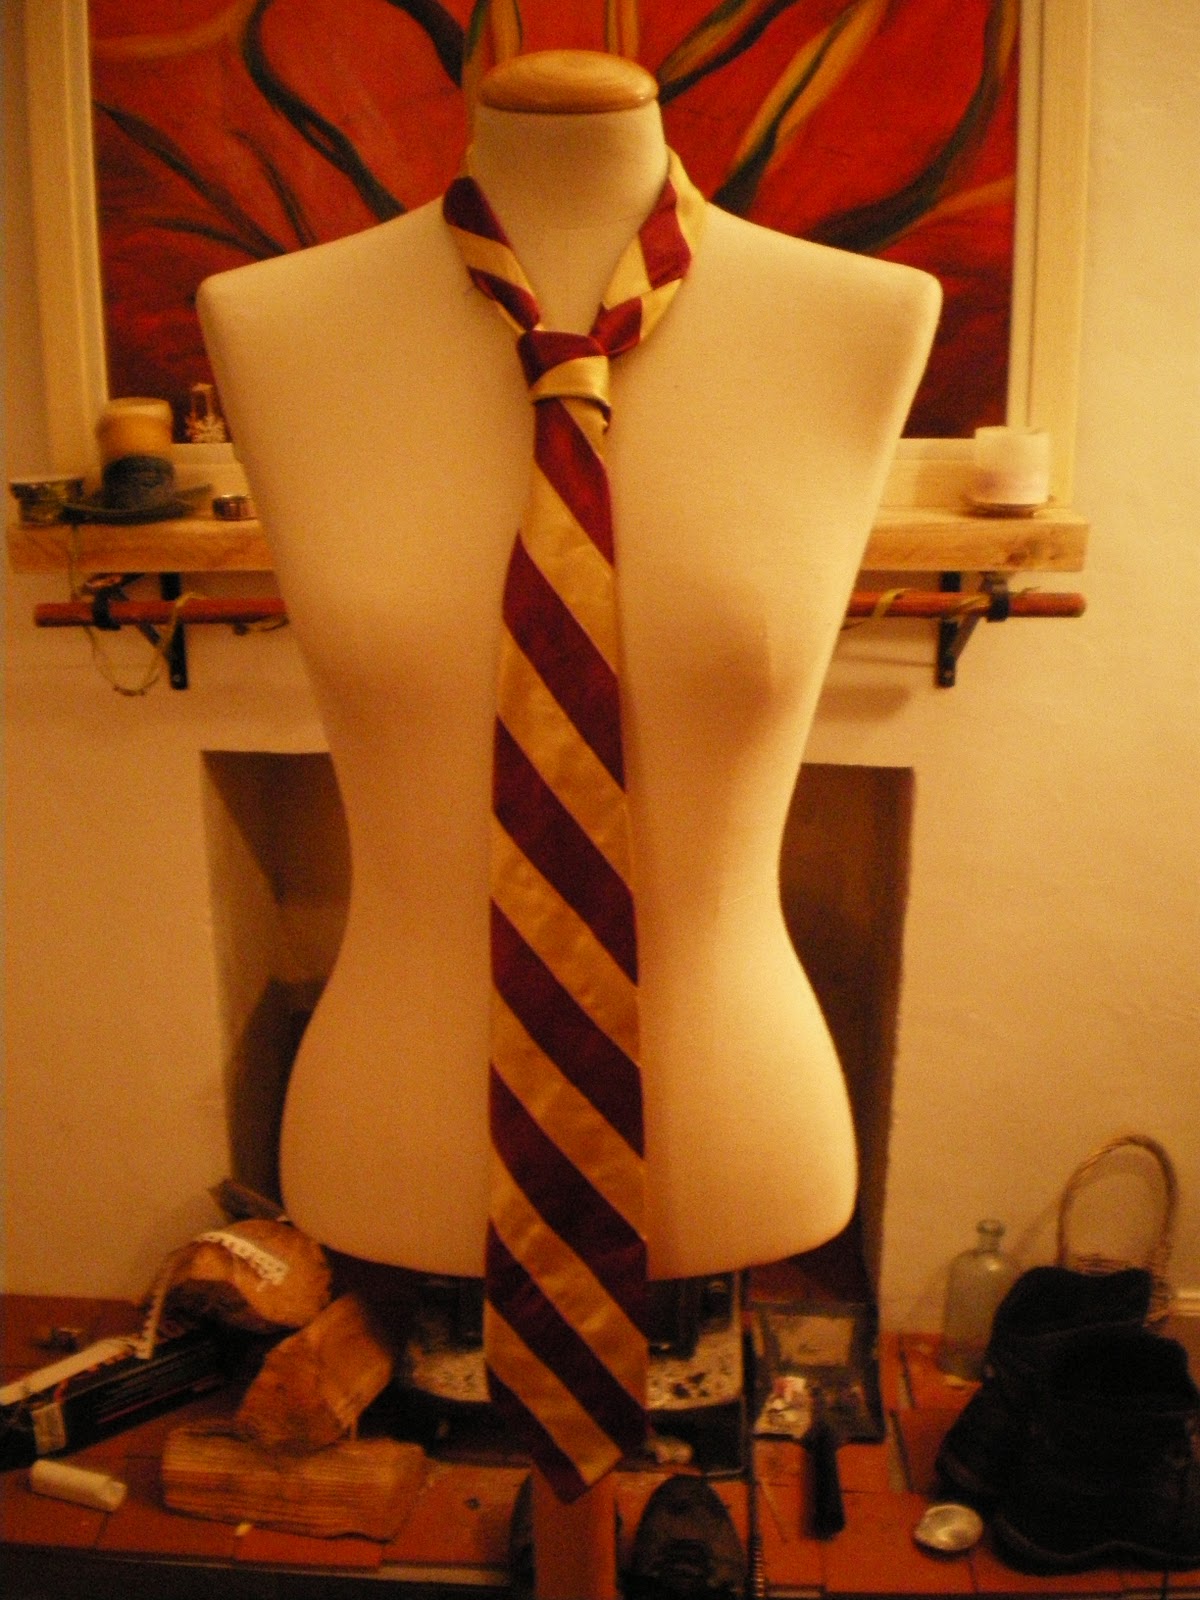
Unfortunately, it did end up a bit long, because working on the bias is extremely hard, but you live and learn. My next tie was more successful. For this I went for the 3rd movie onwards tie. It took longer as I used thin ribbon with a slightly thicker one to match. Again this was fiddley especially keeping the ribbon straight and even. But I think it turned out well, it isn’t as long and sits better when I’m wearing it.

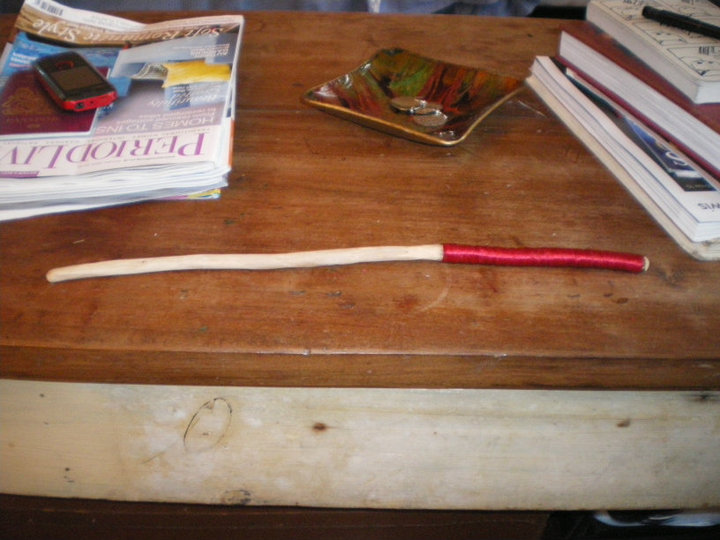
To finish everything off I made a wand for myself. This is my second attempt, the first I made of willow which I whittled, then stained with ink and varnished. The handle was wrapped in leather thonging. For this one I used a piece of hazel which I whittled then varnished, the handle is wrapped in red ribbon.
Anyway I hope you guys like the costume. One of my favourite things about sewing and costuming is making the pattern up as I go along, and then it turning out successfully 🙂 I have plans to perhaps sell robes and/or ties like this in my Etsy shop.
See you in the future ♥
